

An Intricate Look at ARM Templates - Part 2
Prep Work and ARM Template Structure Breakdown
Within my first post, I laid the foundation to build upon as you get yourself up to speed on how ARM Templates can be plugged into Infrastructure as Code) IaC workflows and infrastructure buildouts. As part of this series of blog posts, I will put together a list of materials and links to content that will help deepen your understanding even further. It’s hard to capture everything in a series of blog posts, so going the extra mile and providing additional reading + video material will hopefully keep unblocking your learning on into the future. Additionally, I welcome any emails (shannon.kuehn@gmail.com) or social media messages you may have as you embark upon your journey at getting better acclimated with ARM Templates. Lastly, you can also get in touch with your pals at Skylines Academy (admin@skylinesacademy.com) for any questions. Basically, no question is “dumb,” so we welcome any opportunity to help you dig as deep as possible.
“So now what?” you may find yourself asking. Well, we’ll need to have some sort of text editor installed. Anything from Visual Studio, to Visual Studio Community, to Visual Studio Code, to Sublime, to Notepad++, etc. If you’re a hardcore Linux guru, you could even use VIM! Basically, we need something so we can examine the syntax inside the ARM Templates themselves (P.S. You will not want to edit your templates using regular Notepad). Rather than reinvent the wheel here, I’ll refer you to a few links/tutorials for Visual Studio and Visual Studio Code. Note, I will focus on Visual Studio over the course of the remaining blog posts, so it may make sense to start there from an installation point. The reason for this choice is directly related to the engineering involved with plugging into some of the pre-existing templates so you don’t start from scratch. Please examine the links below. If you do not like these text editors, you can search around online for the right way to install your text editor of choice. Once you have a text editor installed, please move forward to the next section that discusses all the different components of an ARM Template.
Visual Studio
Visual Studio Download
Install Visual Studio Tutorial
Shannon’s Notes: The biggest caveat here is Visual Studio Professional or Enterprise requires an active subscription (i.e. an active Visual Studio, a.k.a. MSDN, subscription). You can use the trial version, however if you do not have an active Visual Studio subscription, I would recommend the Visual Studio Community Edition (which is free). You can find both editions in the first download link.

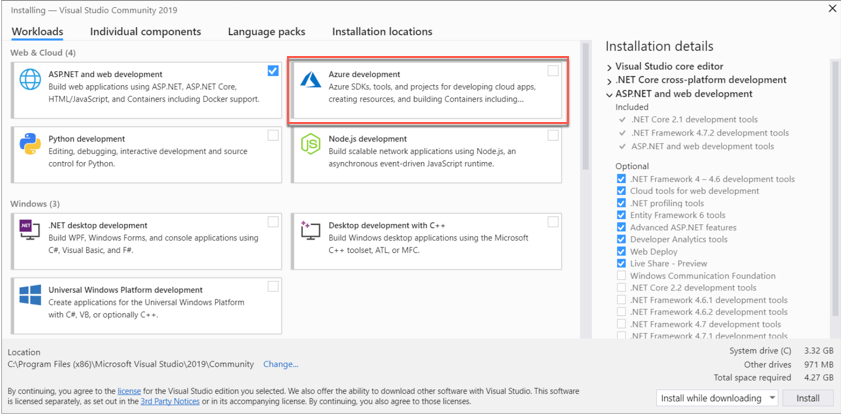
If you’re brand new to ARM Templates, the prebuilt engineering inside this text editor is helpful at first (keep in mind, this is an opinion I hold and it’s based upon my own experiences with the tool). Also, when you are selecting the workloads during setup, make sure you choose Azure Development (ASP.NET is only necessary if you will use this editor for .NET development and note this can all be adjusted after installation). Lastly, Visual Studio is recommended for Windows (don’t worry – there’s a text editor for you if you are on other OS platforms):
Visual Studio Code
Download Visual Studio Code
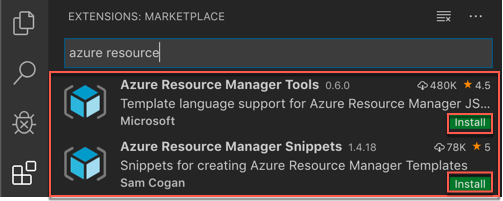
Shannon’s Notes: This is a straightforward installation, so selecting the default settings + install location as you click next throughout the wizard will get you up and functional. Visual Studio Code is the text editor I personally use more often these days because I can use it on Windows, Mac, or Linux across a broad range of programming languages. Once installed, look at the far-left side of the editor. You should see a series of icons. Click on the 4 cubes that make up a square, with 1 cube coming off that square:

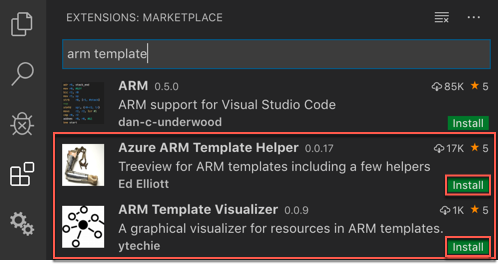
From there, type in Azure Resource Manager, install the two plugins I call out below, plus type in ARM Templates, and install the two plugins I call out inside the second screen shot.
ARM Template Structure
Now that you have a text editor installed (and before we dig into your first ARM Template), I wanted to quickly go through the structure, so you are aware of each section inside a template. I think understanding more of this will be helpful as you start building out infrastructure within Azure.
To start, here is a basic shell of all components that can make up an ARM Template.
{
  "$schema": "https://schema.management.azure.com/schemas/2015-01-01/deploymentTemplate.json#",
  "contentVersion": "",
  "apiProfile": "",
  "parameters": {  },
  "variables": {  },
  "functions": [  ],
  "resources": [  ],
  "outputs":
 }
From Microsoft’s official documentation, the following chart is depicted, so save this as a reference in understanding the different components of an ARM Template (plus what’s required vs. optional):

Out in the wild, I don’t see apiProfile or functions used all that frequently, so I will not focus energy on describing those ARM Template components. Believe me, if you’re interested as you move forward, there are plenty of code examples on GitHub and within the Microsoft docs. :)
$schema
This section of the ARM Template documents the URL location of the JSON schema file which describes the Azure templating language. The schema URL file becomes an anchor inside text editor tools that use “intellisense” features (i.e. Visual Studio or Visual Studio Code) to provide tab completion for code buildout, content assistance, and even code hinting. Whatever editing tool you use, the “intellisense” features help you know when something is wrong with the template from a code perspective, because the tool compares your syntax to the schema file.
Go ahead and copy/paste the following link into your browser of choice:
https://schema.management.azure.com/schemas/2015-01-01/deploymentParameters.json
You should see something like this:

There several available schema versions, all located here. As a best practice, Microsoft recommends using a top-level schema (hint: a top-level schema is what I shared above) for your deployment templates. The beauty is you do not need to memorize this link, as you will come across the link within many GitHub repos, Microsoft examples within documentation, and some of the engineering within Visual Studio that I will cover in a later blog post. Using that top-level schema updates all child schemas together, so existing templates do not need to be updated as APIs are phased in and out. Multiple API versions are supported related to child schemas. This allows for decent backward compatibility related to the templates you create. Also, the schema is required for every ARM Template you create.
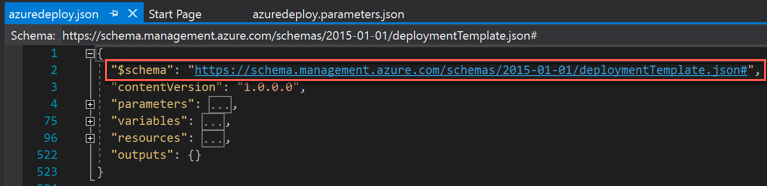
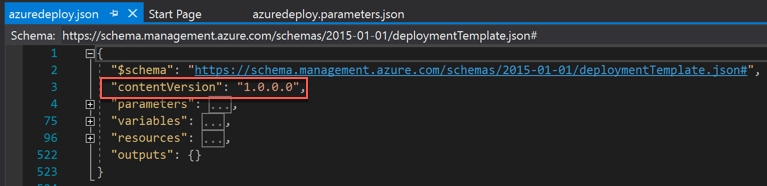
The last major discussion point is the $schema section is different than schemas you may see referenced within the parameters section. A quick visual of the $schema section is shown below within an actual ARM Template:
contentVersion
Most templates will have “1.0.0.0”, displayed within the template. If you are part of a shop that has gone through or is in the middle of a digital transformation, you may see DevOps playing a big part within infrastructure buildouts. Within ARM Templates, you can use contentVersion to version specific builds for applications or workloads. This should help you manage changes over time. Note, like schema, contentVersion is required for ARM Templates.
parameters
At a basic level, parameters store definitions used within the ARM Template. The actual parameter name holds some flexibility within the templates you create, but underneath those parameters you create, you will need to detail components so the template can be deployed. I am going to break down the different pieces you might start seeing within the parameters section. Parameters are not required to deploy an ARM Template.
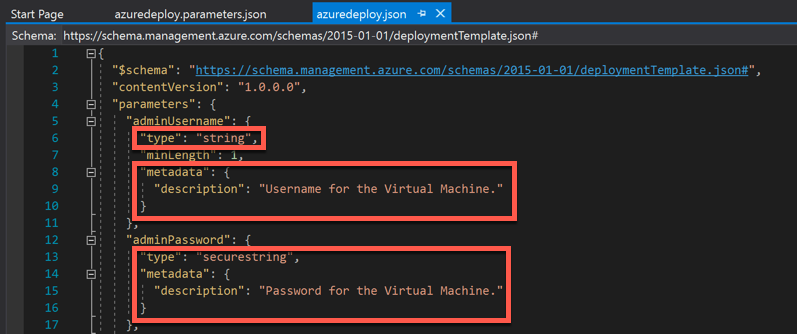
type:
The most common types I see built out are string (text representation, like an admin username) or int (number representation, like the number of VMs deployed). For all passwords, they should be listed as securestring.
metadata:
As I’ve built templates for customers, I started making use of the metadata field within parameters. I’ve found customers enjoy the references (a customer jokingly even called it a “cheat sheet”) as they become comfortable with what an ARM Template is doing. I fully encourage you to make use of the metadata sections, so you know what the parameters are for and how they are used.
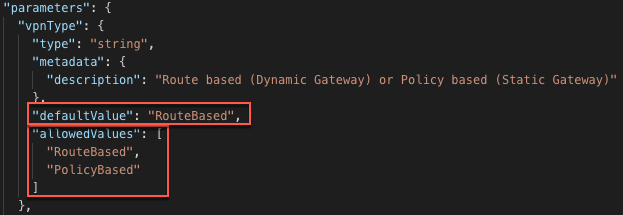
allowedValues:
You can define what will be allowed as a value within the templates you build. Adding these into parameters provides abilities to place guard rails in for deployments (i.e. restrict list of VM sizes) and control what users can deploy (i.e. you can only deploy Windows Server 2012 R2 and newer Windows server OS images).
defaultValue:
Usually defaultValue is used in conjunction with allowedValues. Declaring this within an ARM Template allows you to specify a baseline for your deployments (i.e. deploy DS2_v2 as a VM size or RouteBased as the VPN type), or you can create different versions of allowed resources by adjusting the parameters file (we’ll get more into the parameters file within a future blog post).
Technically parameters are not required, but as we start building templates, you will soon understand why you will want to use parameters as you build everything out.
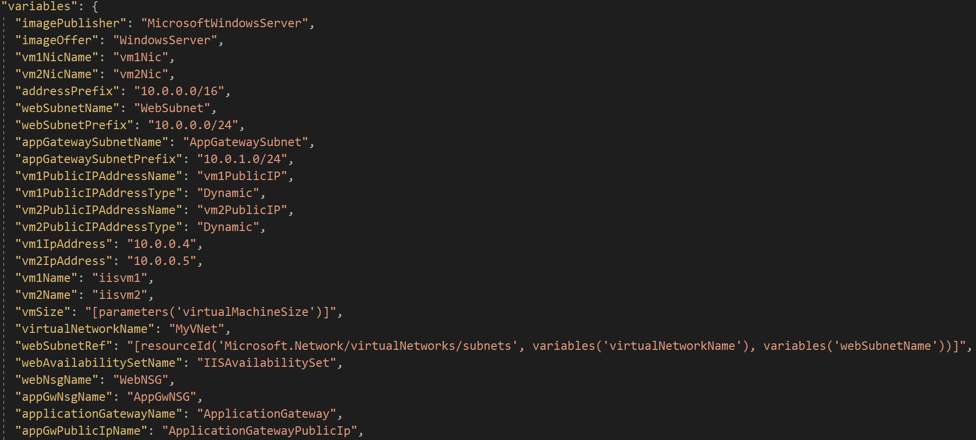
variables
Variables are simply references to settings for your resources. These references are picked up by the resources section of an ARM template, making resource definitions easier. In my time of writing ARM Templates, I tend to use variables if the string I’m using (for example) is being referenced multiple times within the resources section of the template file.
Like parameters, technically variables are not required to build an ARM Template. As you uncover more of the ways that variables help, you most likely will not be without variables within your future deployments (same with parameters).
As you become more familiar with writing templates, you will devise your own way of picking and choosing when to use a variable and when to use a parameter. A colleague of mine (Matt Canty) wrote a great blog post that I reference often with customers who are just starting in on their journey with ARM Templates. Hopefully it gives you some guidance on how to craft these templates in a way that makes the most sense for you.
resources
After $schema and contentVersion, resources is the next required section of an ARM Template. This is the section that calls out each resource you are looking to deploy. If you are deploying a VM on Azure, you will need a resource for every piece of infrastructure and a corresponding resource within the ARM Template. As an example, think through everything you may need for that VM deployment. Everything from the VM object, to the disk (or disks), to the NIC, to the public IP, etc. The resources section is where you reference declared variables and parameters from earlier in the template. The visual below shows how you can call upon those sections:
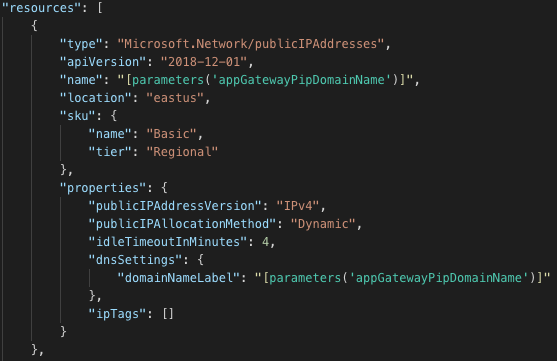
Resources tend to have specific components that need to be called out as the ARM Template is deserialized upon deployment. Please make note of the following fields:
Location: You might be tempted to create a parameter for Location. However, a better practice is to inherit the location from the resource group. Regardless of how you craft out your ARM Template, you may see Location called out as a parameter that is referenced by each resource.
Type: The Type element for a resource is a combination of Resource Provider (discussed in my previous blog post) plus the Resource Type (ex: Microsoft.sql/servers).
Comments: Helpful info to clarify what the resource is or what it’s being used for. Think of this as being similar to the metadata fields within your parameters.
DependsOn: This helps Azure understand dependencies, so it can deploy resources in parallel or sequentially, as appropriate.
API Version: A version is specified for each resource which is associated with a version of the REST API. The version impacts which elements can be specified for the resource, so the versions are updated on occasion.
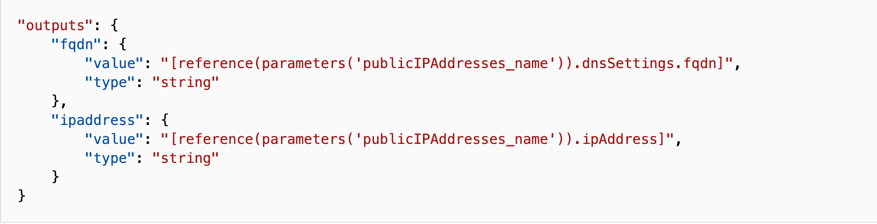
outputs
If you ever want to grab a public IP address without logging into the portal upon completion of your template build, the output section becomes a great spot for that information. Additionally, you may want to grab a FQDN post deployment. The outputs section provides a way to reference this information without having to log into the portal or issue out a PowerShell/AZ CLI command to grab necessary details about the workload you deployed.
ARM Template Limits
As with all things in Azure, there are some limits you should peruse so you never find yourself in a bad spot related to template buildout. In general, you have a lot of flexibility here (don’t think of the published limits as actually limiting). As you you’ll start to see, templates can become large artifacts altogether too quickly, so always keep the link above handy as a reference if you find cannot build your environment using an ARM Template.
And this concludes the next installment of our series on ARM Templates. As we gear up on building out the next few posts, make sure you’re prepared to dig in and get hands on with some actual sample code. While you wait, feel free to read through some of the supplemental links below.
Additional ARM Template Links:
Microsoft Documentation
Structure and Syntax of ARM Templates
ARM Template Best Practices
ARM Template Reference
Books
Courses
Mastering Azure Resource Manager
Azure Master Class: Manage Azure Cloud with Azure Resource Manager and ARM Templates
Publications
World Class ARM Templates