Writing your First PowerShell Script
*If you're just joining us, this post is part of a 12-part series on Getting Started with PowerShell. If you'd like to catch up (or skip ahead - more posts coming soon), click on the appropriate post below.
Getting Started with PowerShell
Windows PowerShell, PowerShell Core and PowerShell: Huh?
Installing PowerShell and Visual Studio Code
Running PowerShell Commands and Getting Help
Working with the PowerShell Pipeline
Understanding Loops in PowerShell
Throughout this series, you've been in the PowerShell console. You've been manually typing in commands, running them and seeing what comes back. That's fine if you need to bang out a quick command to do something simple but the console's going to fall short for more advanced tasks.
PowerShell is called a scripting language for a reason - you write scripts with it. What's a script? In PowerShell terms, a script is a combination of commands all working together to be run at one time.
A script can be one to thousands of lines long. When PowerShell executes a script, it starts at the top and makes its way down to the bottom until it has run all of the code in the script.
Creating a Script
In a previous post in this series, you learned how to install Visual Studio Code. Now's the time to start using it!
Even though you can technically write a script with notepad, it's not a wise decision. Visual Studio Code and the PowerShell extension are built for PowerShell code. It understands the syntax, offer tips, suggestions, syntax highlighting and more. If you're writing PowerShell scripts, you should be using Visual Studio Code so let's get started!
All examples in this article will be using Visual Studio Code v1.42.0 on Windows.
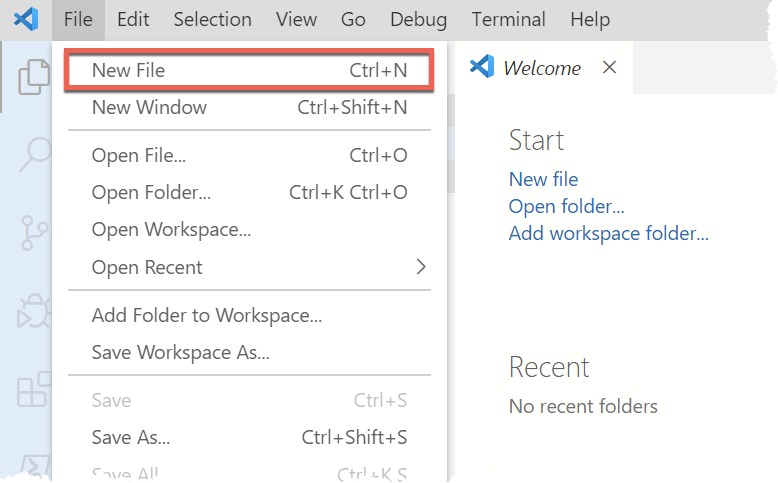
Open up Visual Studio Code. You will be presented with a Welcome page. Click on File and then on New File as shown below. This will open up a place for you to begin writing.
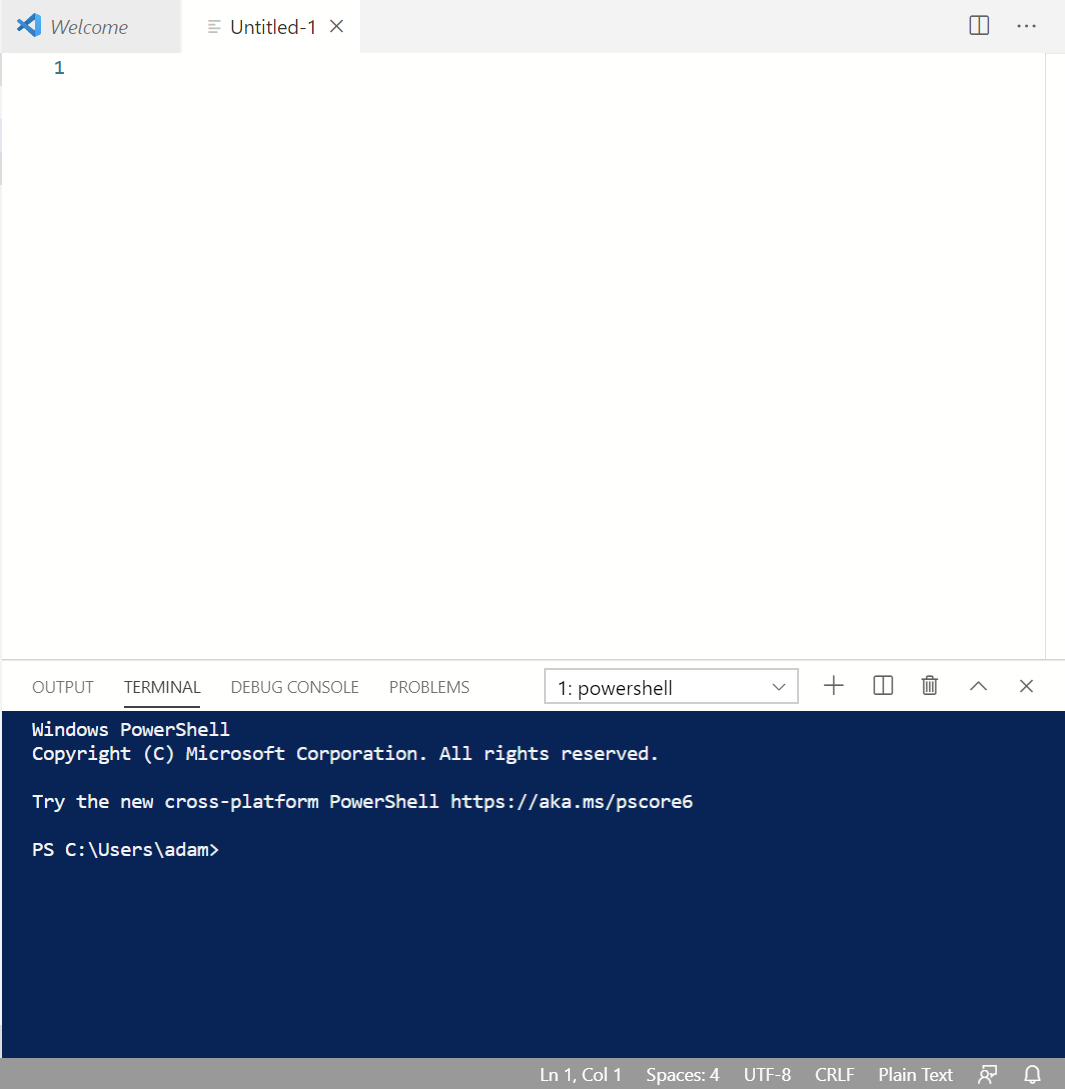
You'll soon be presented with a window to create a script and a window that looks a lot like a PowerShell console. This console is the Visual Studio Code integrated terminal. Since you've already installed the PowerShell extension, it should be a PowerShell prompt.
At this point, Visual Studio Code doesn't know you'll be creating a PowerShell script. Notice that the tab at the top representing the script is called Untitled-1. There's no .PS1 after it. Visual Studio Code is a language-agnostic editor so it doesn't know what kind of code you're going to write.
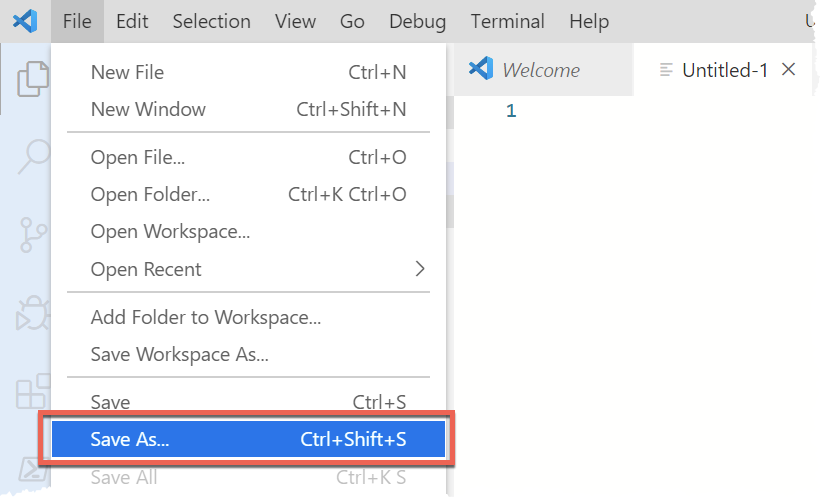
Without writing any code, let's tell Visual Studio Code, this will be a PowerShell script. By saving the file as a PowerShell script now will enable all of features that come with the PowerShell extension. To save the file, go up to File and then click on Save As as shown below.
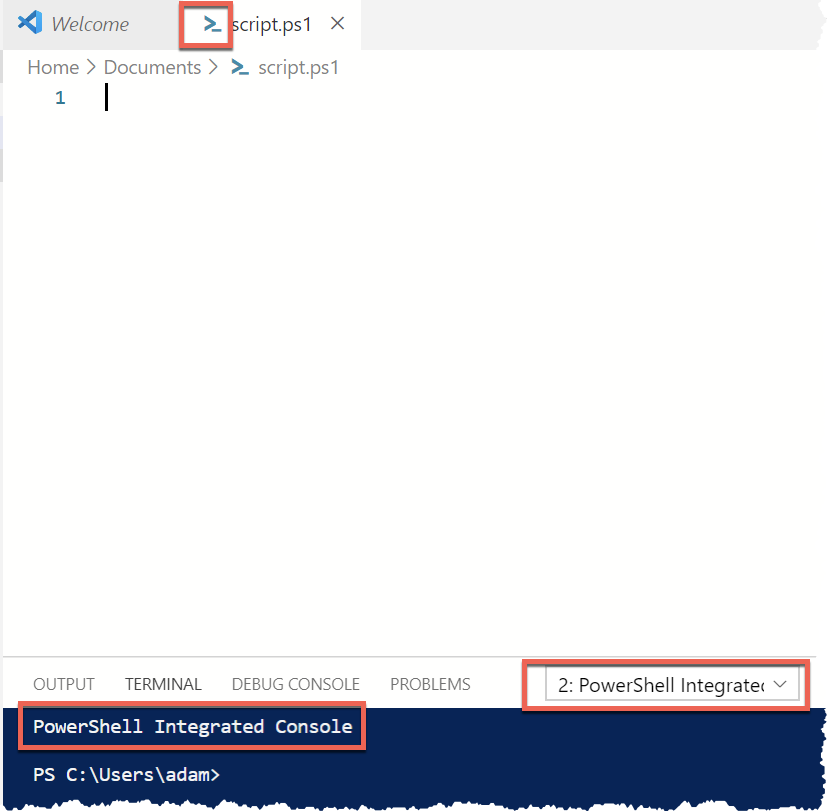
Save the file as something with a .PS1 extension. Once saved, you'll then see the script transform.
The tab now has a PowerShell icon and the terminal has now turned into the PowerShell Integrated Terminal. Previously, the terminal was just bringing up pwsh.exe.
Now that the editor knows you're working with PowerShell, you can begin writing code.
Writing PowerShell Code
A PowerShell script can be just about anything you want it to be but let's narrow that down and write a simple script to stop notepad.exe if it's running.
First, open up Notepad to start the process and go back to Visual Studio Code.
At line 1, start typing Get-Process. You'll soon see Intellisense come up. This is a feature that tries to predict what you're going to type and provide a shortcut. Arrow down until you get to Get-Process and press Enter.
Begin typing the parameter Name and you'll see Intellisense is at it again. This time it knows the notepad process is running and allows you to choose it from the list.
Once you have Get-Process -Name notepad typed out, ensure your cursor is on the line and press the F8 key. You should see that the code on line 1 was run in the integrated terminal just like you were at the PowerShell console.
Once you have Get-Process -Name notepad typed out, ensure your cursor is on the line and press the F8 key. You should see that the code on line 1 was run in the integrated terminal just like you were at the PowerShell console.
Selecting a single line at a time and pressing F8 is a great way to run parts of scripts rather than having to run the entire script at once.
Now save the script by going up to File and clicking Save.
Congratulations! You've written your first script!
Running the Script
Now that you have the code saved in a PS1 script, you can execute it using the PowerShell console.
Open up the PowerShell console and navigate to the folder where you saved the script using the Set-Location cmdlet. The Set-Location cmdlet is similar to the DOS cd command you may be used to. It changes the current directory you're in.
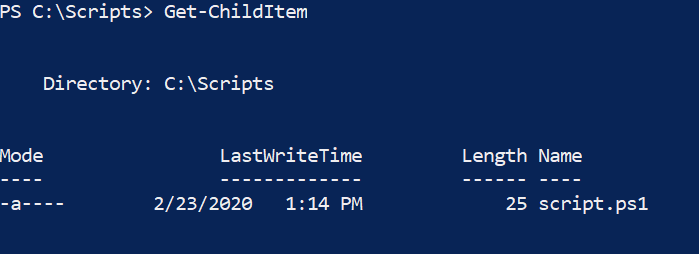
Now use the Get-ChildItem cmdlet to ensure the script was saved in that folder.
Once you confirm the script exists, now run it by typing the first few characters of the name and hitting the Tab key. You'll notice that the console finds it. If not, keep hitting the Tab key to cycle through all of the available files.
When you find the PS1 script, run it by hitting Enter. You should see the same output you received in the integrated terminal.
Congrats! You've now executed your first PowerShell script!
Making a Script a Script
You might be thinking, "Wow, big deal. We essentially just took some code I could have run in the console myself and moved it into a script" and you'd be right. But what you've done is lay the foundation for much larger scripts that can do all kinds of things!
Continuing on with our example of killing a process only if it's started, let's add some logic to this script. This is a script so it's common to include multiple lines (sometimes thousands). PowerShell executes each line from top to bottom.
Below you'll see an example of using and if/then statement and a variable. The code is saving the process object returned from Get-Process into a variable. When the script runs, it then goes down to line 2 and checks if there's anything in the $process variable. If so, it uses the pipeline <link here> to send that object to the Stop-Process cmdlet.
$process = Get-Process -Name notepad
if ($process) {
    $process | Stop-Process
}
Now save the script and run it again in the PowerShell console. What happens? Notepad should close.
This behavior of adding commands and logic to a PS1 script is core to going from console to script.
Summary
Writing scripts is foundational, required knowledge to have when learning PowerShell. Think of a script as simply a bunch of lines you can type out in the console all run at one time.
Putting code in a script allows you to begin packaging up code that performs a particular action. There's no need to copy/paste or remember that complicated command anymore. As long as you store the code in a script, you can execute it at any time.


